A Big Update

Over the past several weeks, I have been working on a massive overhaul of everything within the Raccoon Game – so much so, that simply writing it all out wouldn’t do it justice – so, here is a video, showing the gameplay so far, within a minigame

This, obviously, isn’t the puzzle game I set out to design – however, a simple food collection minigame has helped the development of both myself, and the game, in several ways.

First of all, it has given me the ability to test multiple aspects of the game – from the more obvious things, such as item collection and npcs, to the things you might not think about – edits to the movement and camera scripts, for example

It has also allowed me to create a fun, finished product, while waiting on other team members to create the necessary pieces for me to continue onto the main game.

Now that that’s out of the way, you may be wanting a breakdown of what all has changed since my last update; while the above is a good overview, below will be an in-depth analysis of everything I have done for this game!

Movement:

First of all, I completely redid the movement script – changing from a badly constructed script, to the standard assets pack script – before fully rewriting my original movement script. I did this, because my first script was buggy, difficult to read, and often unreliable. The standard assets script also had many faults, and relied on many things that I either removed or repurposed – as such, a new script was necessary. My new script is far cleaner, and more reliable, than any of my previous ones.

On top of accounting for everything from walking, to jumping, to sprinting, the script also contains handlers for various other features – including the ‘scream’ you hear in the video, used to warn off enemies.

Camera:

Much like the movement script, the camera script has also gone through many changes – starting with one I found online, moving to the standard asset pack third person camera, before being completely rewritten for purpose.
The original camera script I chose was functional, but not without its bugs; the standard asset pack script was very useful, but overcomplicated, and had many bugs – the worst of which included flipping the camera around every time the player jumped – which could make it difficult to navigate mid-air.

The new camera script is cleaner, far shorter, and very easy to understand – its simplicity makes it easy to fix and edit, and ensures that its reliable.

Getting to this point was extremely complicated, and included a lot of trial and error…

…A lot of trial and error.

NPCs:

The games NPCs were one of the most complicated, but most useful, elements I managed to create; while they can, at times, behave unpredictably, they work the majority of the time, and the errors now are, thankfully, insignificant.

I created the NPCs using Unitys NavMesh functions – building a NavMesh from my game world, and making each of the NPCs Agents of that Navmesh. I used the standard asset pack NPC controller as a base, and built my own AI controller script – changing its targets based on different situations.

The majority of the time, the NPCs positions are randomized from multiple possible positions – once a certain amount of time passes, their position is randomized again, causing them to wander around the ‘park’.
If they spot the player, they will give chase – and, if they reach the player, they will kick them away – dealing damage, and throwing them a distance.
If they player continues to run, they will eventually lose interest, and return to wandering.

The player also has one more choice – they can press E, to screech at the humans – startling all humans in their radius, causing them to run away for a time – though this, again, wears off.

Pick-Up Items:

Pick-up items are another addition to the game – using the mouse, the player can click on pick-up items, which the racoon will then hold in their mouth. Upon letting go of the mouse, the racoon will drop the item. As such, they can only carry one food item at a time

Points:

With pick up items, they player needed something to do with them – this is where the point system comes in! In this minigame, the player must throw away the food items – gaining points based on how big the item is

Spawning Objects:

In order for the game to continue, I needed to spawn objects – currently, all food objects spawn randomly, and fall from the sky. This uses a simple instantiate script attached to a spawner, which would randomize a position, and spawn a random food item, after a random cool down – the enemies are spawned according to a very similar script

Animation and sound:

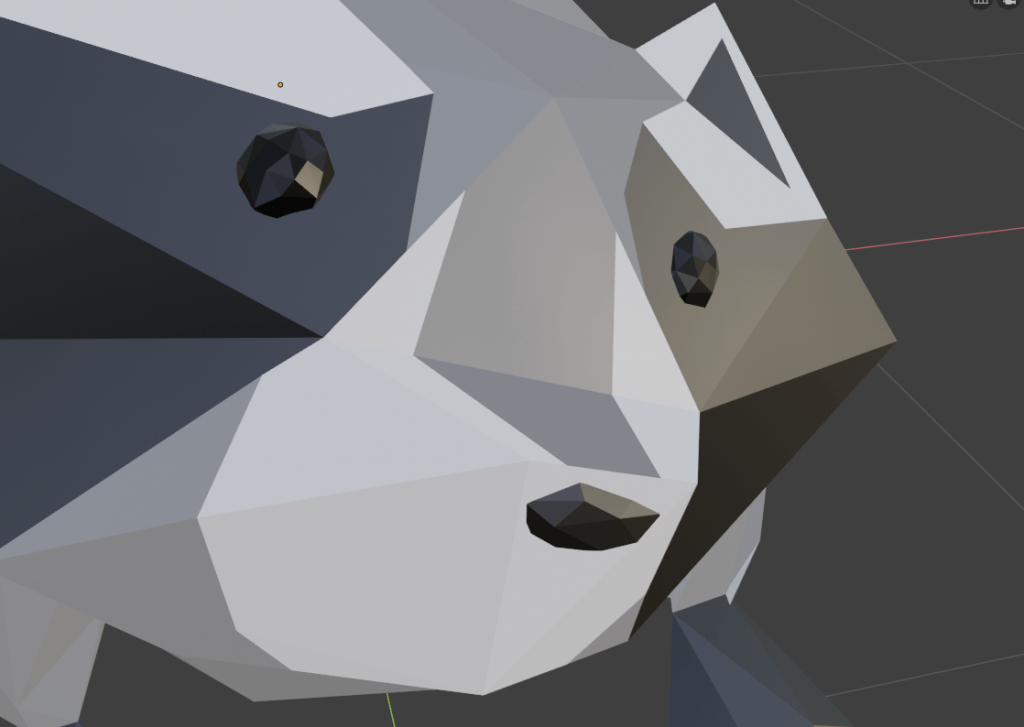
Next, I needed to make the game look a little better – using animations! I started by making some animations using Blender; I used blender, as I had some experience using this program from last year. I made animations for walking, running and jumping, and plan on making more animations in the future. I’ve thus far managed to make the animations work for the player – walking and jumping animations triggered in the movement script for each action

I used the same strategy for the sounds – I took some royalty-free sounds off of sound library SoundBible, and cut and stitched them together using Adobe Premiere, as this is a program I have lots of experience with. After this, I exported each sound as MP4, and placed them into my game files – using those clips and various audio sources, triggering them in the movement script in response to each relevant action.

An Update!

As you’ve probably noticed, this blog has been quiet recently – and that’s because I have been working on unity!

Unity is a game development program, and its free! Its a little complicated to start with, but, thanks to a wealth of information available online, I’ve been making great progress in game development

In order to illustrate everything Ive worked on over the past month, please view the video below! It demonstrates a test level I built for the game, including a killfloor (below) and a handful of pickup objects

As you can see in this video, I have done a lot of work – I have fully functioning menus, including a pause screen and task sheet that can be accessed with tab, with the full ability for upscaling, changing and reusing them as necessary – I have a character, with a following camera, and the ability to move, sprint, jump, and pick up objects as I want.

However, there are many issues, as can be seen in the video above – sometimes, the objects let themselves be picked up correctly, and are counted – other times, they get deleted at random – either all at once, or whenever I approach them – for reasons that I have yet to work out. As I cant determine the cause, it’ll likely be best to rebuild the system completely – and I currently have plans to replace this pickup system with a ‘holding object’ system – it just might take some time to build, and will require some research to create.

Also, as can be seen at the end, the sprint key occasionally breaks, and causes rather severe issues – the racoon speeding up unstoppably in a single moment, and flying off into space so quickly the camera cant follow – breaking the game completely. I could rectify the game-breaking by putting kill-floor walls in – but, this wouldn’t fix the game attempting to launch the player, and would still be a major, and common, game-breaking bug

Obviously, there are a lot of things that need to be fixed before I can even start assembling the actual game – but, for someone who has never worked with unity before, I feel I have made a lot of progress, and learnt a lot in the process – and will only continue to do so!

raccoon model (test?)

i wanted to test if the style we wanted for the game would work in 3D, and i wanted to test my blender skills some more. so i made a raccoon model! for now its just a test until we decide on permanent assets.

first, i sculpted a basic shape in zbrush, then re-topologized that and imported it into blender. i lowered the poly count as much as i could without destroying the whole shape (which was just under 900 polys or so) and added eyes and a nose.

then, i textured the model using the material editor in blender, and the knife tool to get the shape i wanted. this allowed me to colour different faces with different materials, so i could get a good texture without having to use any uv editing. this also allowed me to easily make shiny eyes (made a black material with loads of specular and metallic effect, and no roughness.)

next came the rigging! this one took me a while to figure out, as after i created the initial armature, i had an issue where the eyes and nose didn’t interact properly with the mesh and the armature. i eventually fixed this but merging the eyes + nose with the initial mesh, and creating armature after that. i also edited the armature slightly.

and, voila! this is my finished test model so far, and an idea of the art direction for the models in game.

– ellie

The Bin – 3D Modelling

One element that will be needed in the game is a simple bin model – an American-styled metal ‘trash can’, complete with lid. This asset could be useful in levels, or in the title screen – which we have envisioned having a bin with the raccoon in it!
I am using 3DS Max to model and map this asset

This is my simple bin model to start – the ‘body’ and ‘lid’ are separate pieces, so can be removed from one another, and the lid is designed to be slipped on and off with ease. the shape is simple, and low poly, to fit the likely game design

This shows inside the bin – it is hollow, so it can contain items or other models, and for the sake of ‘realism’ if the camera was to look inside the bin – so, it isn’t one solid object

The lid is also partially hollow – designed to slip over the top of the bin, in order to allow it to come off easily, while not simply sliding off if we are to implement physics

Here is what that model looks like with a simple ‘metal’ noise texture is applied, without a UVW map, or any kind of ambient occlusion, normal or specular maps. As you can see, it is less than appealing to look at – so, I will need to unwrap my model

Here is the main body of the bin, complete with seams – represented by the green lines

And here is the UVW map – the two rectangles represent both the outside and inside of the bin, whereas the circles are for the bottom of the bin (inside and outside), and the ring is for the rim of it. I can then place this into photoshop and map it myself

Here is the lid, also showing the seams – both on the handle and main lid

Here is the UVW map for the lid – it looks more complicated due to the more complex geometry, despite being smaller – but, when modelling, it shouldn’t be too difficult to work with

These are my completed diffuse maps, complete with metal texture, for both the main bin and its lid. To make these, I used photoshop, as well as metal textures I found online

Here they are placed in the material editor, under ‘diffuse colour’ and ‘bitmap’

As you can see, the bin still looks wrong, and rather flat – that’s what the other types of map are for!

In order to save myself time, I will be using a generator for my normal, specular and ambient occlusion maps on most all of my models – it can be found using this link: http://cpetry.github.io/NormalMap-Online/

Here is the material editor as shown now, along with a render of the bin, now factoring in the others maps – it looks far more textured than before!